There's nothing quite like the thrill of finding the perfect ring online, but that excitement can quickly turn into a frustrating guessing game when it comes to size. You need to get it right. The trick is to accurately measure your finger's circumference using something non-stretchy—like a strip of paper or even a piece of string—mark where it overlaps, and then measure that length in millimetres against a size chart. This guide will walk you through exactly how to measure your ring size at home, so you can buy with total confidence.
Why an Accurate Home Measurement Matters

Finding the ring is a fantastic feeling, but it’s a real letdown when it arrives and doesn't fit. An incorrect measurement means you’re stuck with a ring that’s either uncomfortably tight or so loose you're worried it'll fly off. Then comes the hassle of returns, waiting for an exchange, and just hoping the next one is right. It’s a pain that’s completely avoidable.
Getting a precise fit from home isn't just about convenience; it's the difference between a successful purchase and a frustrating experience. It means your new piece will be comfortable, secure, and ready to show off the second it arrives. I've designed this guide to give you that confidence, turning what feels like a tricky task into a simple, reliable process.
Understanding Your Finger's Nuances
Here’s a little secret from years in the business: your finger size isn't a fixed number. It actually changes throughout the day, influenced by a few key things:
- Temperature: Our fingers have a knack for swelling in the heat and shrinking when it's cold. A measurement taken after a brisk walk on a chilly morning will be completely different from one taken on a hot, humid afternoon.
- Time of Day: For most of us, our fingers are a bit slimmer in the morning and tend to swell slightly as the day goes on.
- Diet and Hydration: Ever notice your rings feel tight after a salty meal? That's water retention at play, and it can definitely affect your ring size.
By keeping these subtle changes in mind, you can time your measurement for the most accurate reading. I always recommend measuring in the late afternoon. Your body temperature is more stable then, and your fingers are at their most "average" size for the day.
The Problem with Guesswork
It’s tempting to just take a guess, but the reality is, it rarely works out. A lot of Australians use home methods to find their size, which is great, but precision is everything. Data from Australian jewellery retailers between 2018 and 2023 paints a clear picture: a staggering 35% of customers had to exchange their rings due to sizing mistakes from these very home measurements. You can discover more insights about ring sizing accuracy and see just how much precision matters.
My goal here is to give you the tools and techniques to beat those odds. We'll get you familiar with the Australian letter-based sizing system and I'll share four dependable methods to ensure your new ring feels like it was custom-made just for you.
Using the Paper or String Technique
This is the classic, go-to method for a reason—it’s easy to do at home and can be surprisingly accurate when you get the details right. Many guides make it sound simple, but a few small tweaks can elevate it from a rough guess to a reliable measurement. Forget grabbing any old piece of string; the key lies in your tools and your technique.
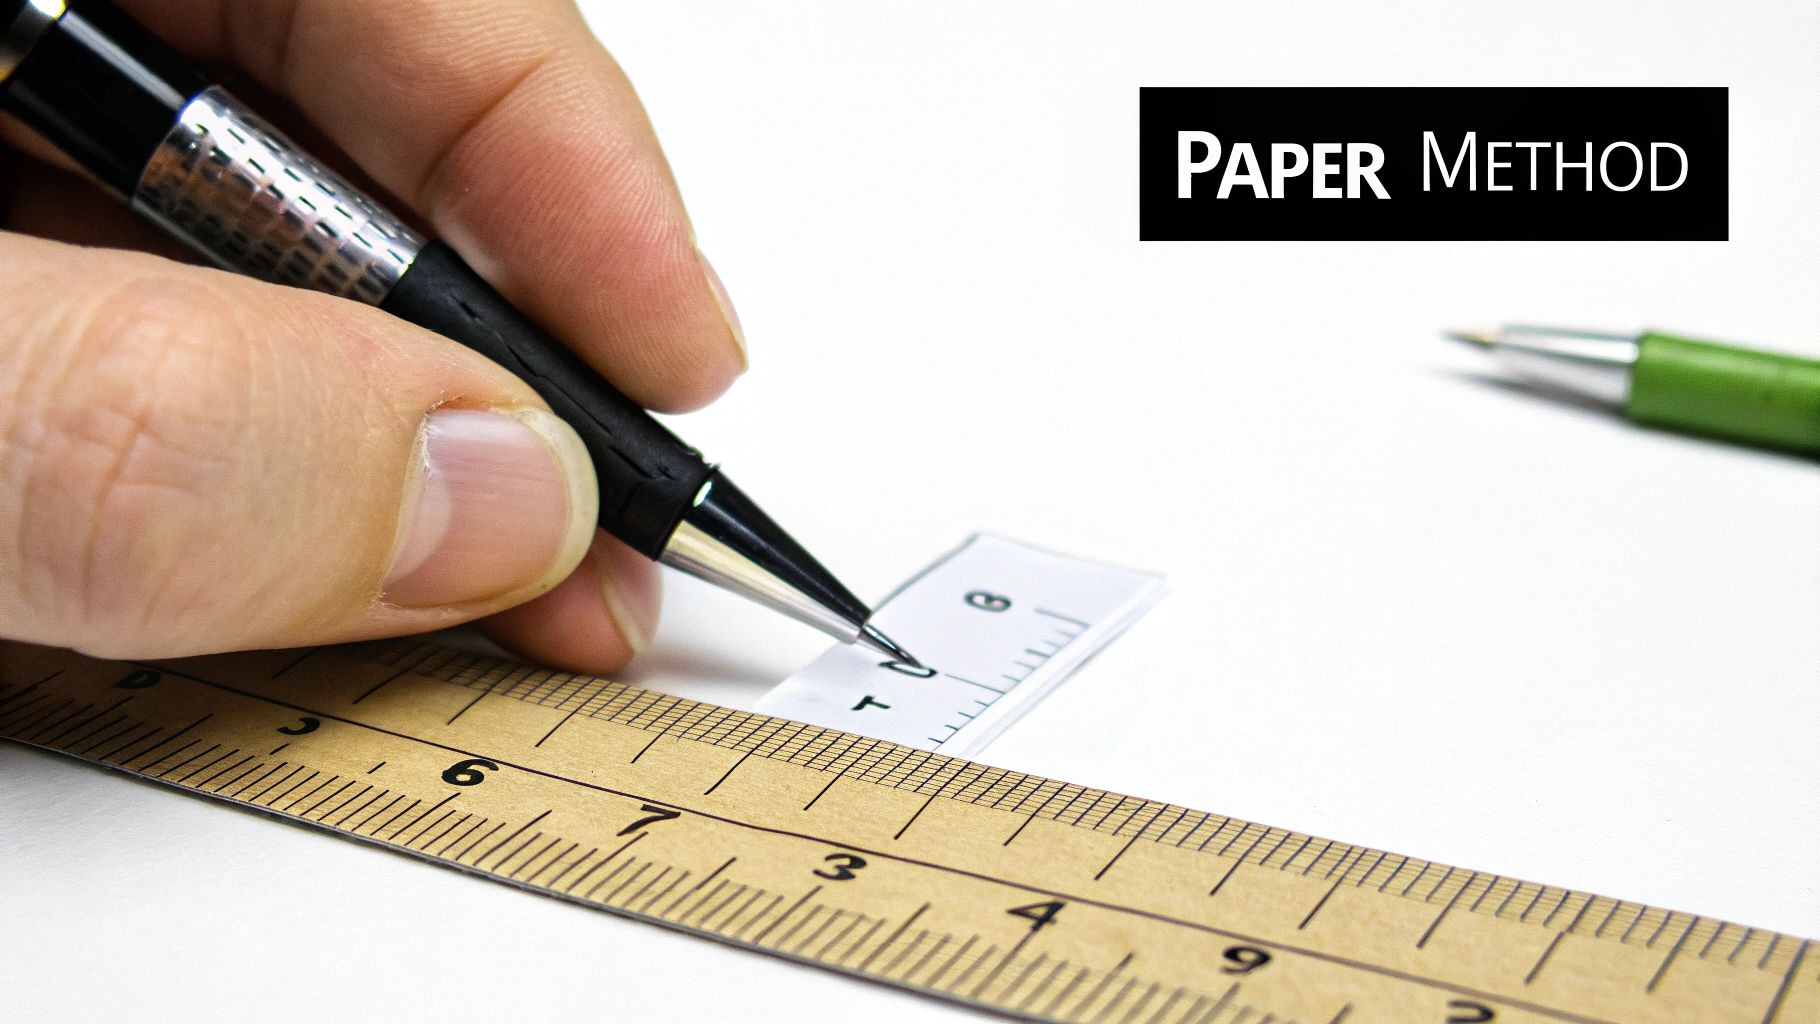
Your success here really depends on precision from the very start. You'll need something thin and, most importantly, non-stretchable. A regular piece of printer paper cut into a thin strip (around 5-6 mm wide) works perfectly. Dental floss is another great option because it's strong and won't give. What you don't want to use is yarn, elastic, or thick ribbon, as these materials can easily stretch or compress, throwing your measurement off.
You'll also need a fine-point pen and a ruler with clear millimetre markings. A blurry pencil line or a ruler that only shows centimetres just won't cut it for the accuracy needed for a perfect fit.
Preparing Your Measuring Tool
Once you have your materials, you're ready to create your makeshift sizer. If you're using paper, cut a straight strip about 10 cm long. The goal is to have something that wraps smoothly around your finger without being bulky.
If you’ve opted for dental floss or a similar thin string, just make sure it's long enough to wrap and hold comfortably. The real advantage of floss is that it mimics the feel of a thin ring band, which can help you gauge the snugness more effectively.
Finding Your Finger Circumference
Now for the crucial part. Take your strip of paper or string and wrap it snugly around the base of your finger, right where the ring will sit. The fit should feel firm but not so tight that it’s digging into your skin. Think about how you'd want a comfortable ring to feel—that’s what you’re aiming for.
Using your fine-point pen, carefully mark the exact spot where the end overlaps to form a complete circle. This mark is everything. Even a millimetre's difference here can change the final ring size.
Here's an essential tip that many people miss: once you have your mark, gently try to slide the paper or string loop up your finger. It must be able to pass over your knuckle with only a little bit of a push. If it gets stuck, your measurement is too tight, and the ring won't go on. You'll need to loosen the loop, re-mark it, and try again until it clears the knuckle.
After marking, lay the paper strip or string flat against your ruler. Line one end up with the zero mark and measure the length in millimetres to the mark you made. This number is your finger's inner circumference. For example, a measurement of 54 mm is a common result.
From Millimetres to Your Aussie Ring Size
With your circumference in hand, you now need to translate it into an actual ring size. Here in Australia, we use a letter-based system that’s closely aligned with UK standards. Each letter corresponds to a specific inner circumference.
For instance, a circumference of 56.3 mm typically corresponds to an Australian size M. This system, which was updated to metric in 1987, uses size increments of 1.25 mm in inner circumference per alphabetical step, creating a very precise scale. You can learn more about the history of ring size standards and how they vary across the globe.
To get this right, please don't rely on a single measurement. Our fingers can swell and shrink throughout the day due to temperature, what we've eaten, and hydration.
- Measure 2-3 times: Take a measurement in the morning, another in the afternoon, and one in the evening.
- Calculate the average: Add your measurements together and divide by the number of times you measured. This average gives you a much more reliable figure.
- Consider the finger: And don't forget, your dominant hand is often slightly larger. Always measure the specific finger where the ring will actually be worn.
This careful, multi-step approach transforms a simple piece of paper into a powerful tool, getting you one step closer to finding a ring that feels like it was made just for you.
Got a Ring That Already Fits? Perfect.
If you have a ring that already fits the intended finger perfectly, you're in luck. This is easily one of the most reliable ways to find your size because you're using a real-world, proven benchmark. It takes the guesswork out of measuring your finger, which can swell and shrink throughout the day.
Instead, you'll be measuring the ring itself. Let's walk through the two best ways to do this accurately at home, so you can translate that perfect fit into your next beautiful piece.
Use a Printable Ring Size Chart
A quick and easy method is to use a printable, true-to-scale ring size chart. These are easy to find online and have a series of circles, each one corresponding to a different ring size. It's a simple, visual way to match things up.
The absolute key here is to print the chart at 100% scale. Your printer settings can't be on 'fit to page' or any other option that might shrink or enlarge the image, as that will throw off the entire measurement.
Once you have your chart printed correctly, just lay your ring over the circles. You're looking for the circle that lines up perfectly with the inside edge of your ring. If you find yourself stuck between two sizes, my advice is always to go for the slightly larger one for a more comfortable fit.
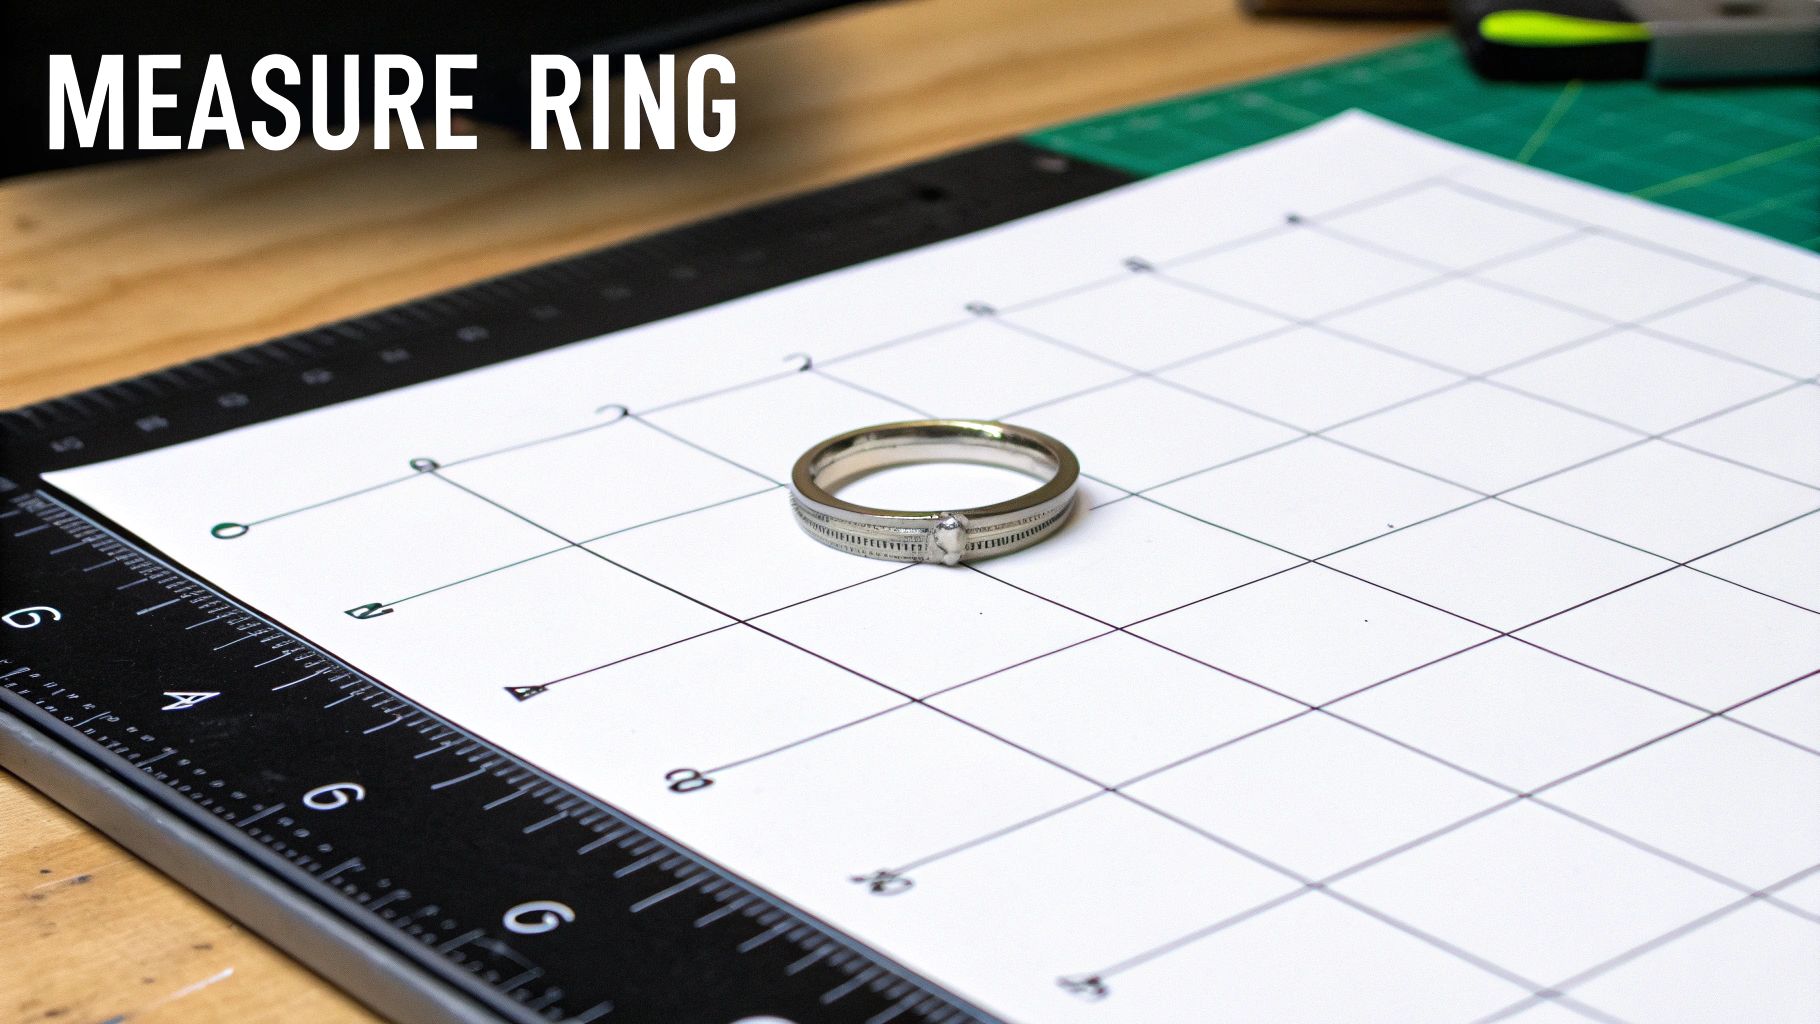
Measure the Diameter Directly
For a more precise, data-driven approach, grab a ruler and measure the ring's internal diameter yourself. This is a fantastic technique because it gives you a specific measurement in millimetres that can be accurately converted into any international sizing system.
First, place your ring on a flat surface. Then, lay a ruler with clear millimetre markings across the exact centre of the ring. The crucial part is to measure from the inner edge on one side straight across to the inner edge on the other. Be careful not to include the thickness of the metal band itself in your measurement.
You might get a reading like 17.3 mm, which is an Australian size N. Precision matters here—even a fraction of a millimetre is a different size—so measure a couple of times just to be sure. With that diameter, a quick check against an online conversion chart will give you your Australian letter size.
One thing people often forget is the band's width. A wide band (say, 8mm) has more contact with your skin and will feel much tighter than a delicate 2mm band of the same size. If you're sizing up from a thin ring to a thick one, you’ll almost definitely need to go up at least half a size.
Don't Forget to Check the Band's Profile
The inside shape of the ring, or its "profile," really changes how it feels on your finger. Knowing whether you have a standard-fit or comfort-fit band is essential for getting the measurement right.
- Standard Fit: These rings are flat on the inside. They have full contact with your finger, making the diameter measurement very straightforward.
- Comfort Fit: These have a slightly rounded or domed interior. This clever design means less metal touches your skin, so the ring glides on and off more easily.
If you're measuring a comfort-fit ring, you need to be extra meticulous. Because of that interior curve, the true diameter is only at the very centre of the band. If your ruler slips towards the edge, you'll get a wider, incorrect measurement, and your new ring will be too loose. Digital callipers are great for this, but a steady hand and a good eye will get the job done too. It’s a small detail that makes all the difference.
Getting it Right with a Printable Ring Sizer
If you like having a proper tool for the job, a printable ring sizer is a fantastic option. It’s a solid middle-ground between wrapping a piece of string around your finger and visiting a jeweller, giving you a visual guide that feels a lot more definitive. For many people, seeing the numbers right there on their finger provides that extra bit of confidence.
This is basically the next level up in your home-sizing kit. You don’t have to fumble with a separate ruler and a pen; everything you need is on one easy-to-use printout. When you get this method right, it's one of the most trustworthy ways to measure your ring size from the comfort of your own home.
The Make-or-Break First Step
Before you even think about reaching for the scissors, the entire success of this method comes down to one tiny but crucial detail: your printer settings. This is precisely where things go wrong for most people, resulting in a measurement that’s wildly off from the very beginning.
When you open the print dialogue box, you absolutely must set the page scaling to 100% or ‘Actual Size’. Whatever you do, don't select options like ‘Fit to Page’ or ‘Scale to Fit’. These settings will automatically shrink the sizer to fit your printer’s margins, throwing the whole scale out of whack. A sizer printed at 95% might not look that different, but I can tell you from experience it can easily put you off by a full ring size.
Here's a pro tip: After printing, always check it for accuracy. Any decent printable sizer will include a reference scale on the page—maybe a 50mm line or an outline of a coin. Grab a physical ruler and measure it. If your ruler doesn’t match the printed scale exactly, you’ve got to go back, tweak your settings, and print it again. Don't skip this check; it’s your quality control.
How to Use Your Sizer
Once you’ve confirmed your printout is perfectly scaled, you're ready to find your size. The process itself is simple, but as with all things in jewellery, precision is what counts.
- Cut it out neatly. Using a good pair of scissors, carefully cut out the ring sizer. You'll also need to slice a small slit where it's marked—this is the key to creating the loop.
- Make the loop. Thread the pointed end of the paper sizer through that little slit you just made. Make sure the numbers are facing outwards so you can actually read them. You’ve now got a little paper belt for your finger.
- Find your fit. Slip the loop over the finger you plan to wear the ring on. Gently pull the end through the slit until the paper is snug against your skin. You're looking for firm, but definitely not tight.
- Read your size. The number that the arrow on the slit points to is your ring size. Look closely, as some sizers will have markings for half sizes.
Nailing the Technique
Just like with the string method, a few insider tricks will help you get a much more accurate reading and sidestep common mistakes. Remember, the idea isn't just to get the sizer on; it's to mimic how a real ring will feel as you go about your day.
- The Knuckle Test. This is absolutely non-negotiable. Once you have a snug fit at the base of your finger, try sliding the paper sizer back over your knuckle. It should go over with just a little bit of resistance. If you have to really force it or you end up crinkling the paper, that size is too small. A ring that doesn't fit over your knuckle isn't much use to anyone!
- Don't pull it too tight. It’s so easy to yank the paper and get a measurement that’s too small. A perfectly sized ring should be able to rotate slightly on your finger without a major struggle.
- Think about band width. Most printable sizers are quite narrow, designed to replicate a classic, thin ring band. If you’ve got your heart set on a ring with a wider band (anything over 6mm), you should seriously consider going up by half a size. Wider bands cover more of your finger, which always makes them feel tighter.
This method really is an excellent all-rounder, combining the ease of a DIY approach with the structure of a professional tool to give you a dependable measurement at home.
Making Sense of International Ring Size Charts
You've measured your finger, you've got your number in millimetres, and you feel confident. Then you find the perfect ring online, only to see the sizes listed in US numbers. It’s a common frustration—what’s a size ‘N’ in Australia is a ‘6 ¾’ in the United States and a ‘54’ across Europe.
This can make buying a ring from an overseas jeweller feel like a bit of a gamble. But it doesn't have to be. Once you understand how to translate your measurement using a conversion chart, you can shop from anywhere in the world without the guesswork.
Why Do Sizing Systems Vary So Much?
It really just comes down to history. Different countries developed their own systems for measuring things long before we started shopping on a global scale. Australia’s familiar letter-based system, for instance, has its roots firmly in British standards.
After World War II, Australia officially adopted a system based on British standards. Initially, sizes were calculated based on tiny increments of one sixty-fourth of an inch. As Australia began its shift to the metric system, things were updated. In 1987, the British Standards Institute revised the system so that each letter now represents a circumference increase of 1.25 mm. This is the standard we still use today, which is why Australian and UK sizes are generally compatible. You can actually read more about how Australian sizing standards have changed over the years.
This infographic lays out the basic steps for any home measurement, whether you're using a printed sizer or just a simple strip of paper.

No matter which method you choose, the key is precision. Taking care at every step—from cutting the paper to marking the spot—is what separates a good fit from a guess.
Your International Conversion Guide
Think of the chart below as your personal ring size translator. Just find your circumference measurement in the first column, and you can see its direct equivalent in all the major international sizing systems. No more confusion.
International Ring Size Conversion Chart
This table translates finger circumference in millimetres (mm) into the corresponding ring sizes used in Australia/UK, the United States/Canada, and Europe (ISO).
| Circumference (mm) | AU/UK Size | US/Canada Size | European Size (ISO) |
|---|---|---|---|
| 46.8 | F | 3 ¾ | 47 |
| 48.0 | G ½ | 4 ¼ | 48 |
| 49.3 | H ½ | 4 ¾ | 49 |
| 50.6 | J | 5 ¼ | 51 |
| 51.9 | K ½ | 5 ¾ | 52 |
| 53.1 | L ½ | 6 ¼ | 53 |
| 54.4 | M ½ | 6 ¾ | 54 |
| 55.7 | O | 7 ¼ | 56 |
| 57.0 | P ½ | 8 | 57 |
| 58.2 | Q ½ | 8 ½ | 58 |
| 59.5 | R ½ | 9 | 59 |
| 60.8 | S ½ | 9 ½ | 61 |
| 62.1 | T ½ | 10 | 62 |
| 63.4 | U ½ | 10 ½ | 63 |
| 64.6 | V ½ | 11 | 65 |
| 65.9 | W ½ | 11 ½ | 66 |
A quick tip from experience: these charts are incredibly helpful, but they're only as good as the measurement you start with. For the most reliable result, always measure your finger a few times throughout the day and use the average.
Once you have this simple conversion down, you open up a whole world of jewellery. You can confidently buy that piece you’ve been eyeing from a boutique in Paris or a designer in New York, knowing it will fit you perfectly.
Common Sizing Mistakes and Pro Tips
Getting an almost-perfect measurement at home isn’t just about following the steps; it's about sidestepping the common traps that can throw your size off. A tiny mistake can mean the difference between a ring that's uncomfortably tight or one that's at risk of slipping off entirely. This is where a little insider knowledge makes all the difference.
Think of it as refining your technique. With these tips from years of experience, you'll learn to account for the subtle, everyday factors that affect your ring size, making sure your final number is as reliable as it gets.
Timing and Temperature Matter More Than You Think
One of the biggest mistakes I see is people measuring their finger at the wrong time of day. Your fingers aren't a static size—they swell and shrink based on everything from the temperature to what you've been doing. Measuring first thing in the morning often gives you a smaller size, while sizing up right after a gym session can give a much larger one.
- Avoid the cold: Never, ever measure your fingers when you're cold. The chill causes your blood vessels to constrict, making your fingers temporarily shrink. A ring sized to a cold finger will feel suffocating once you warm up.
- Measure at the end of the day: For the most accurate reading, try measuring in the late afternoon or evening. By then, your fingers have had a full day of activity and are typically at their largest and most stable size.
A ring should fit comfortably all day long, not just for a few hours in the morning. By measuring when your fingers are slightly swollen, you’re planning for a fit that accommodates these natural, daily changes.
Navigating the Knuckle Challenge
It’s a classic problem: the base of your finger is one size, but your knuckle is obviously wider. This can make finding the right fit feel like solving a puzzle. The goal is a size that can slide over the knuckle with a gentle push but doesn't spin around once it's on.
If you have a prominent knuckle, you'll need to measure both the base of your finger and the knuckle itself. Your perfect ring size is probably somewhere between those two measurements. For instance, if your base is a size L but your knuckle is an N, a size M will likely be the sweet spot.
The Overlooked Impact of Band Width
Not all rings fit the same, and the band's width plays a huge part in how it feels. This is a detail that catches so many people out, leading to a ring that feels much tighter than they expected. It's simple physics: a wider band covers more of your finger, which creates more friction and a snugger feel.
Here’s a good rule of thumb:
- For bands 6mm or wider, you should probably go up by at least half a size.
- For a really wide band, say 8mm or more, you might even need to go up a full size.
Always keep the style of the final ring in mind when you're measuring. If you’re using a skinny ring from your jewellery box to find the size for a new, chunky statement piece, you’ll absolutely need to adjust for that difference.
And finally, don't forget that your dominant hand is usually a little bigger—often by about half a size. Make sure you measure the specific finger on the correct hand you intend to wear the ring on. It's these small, deliberate details that turn a hopeful guess into a confident, accurate measurement.
Common Questions About Finding Your Ring Size
Even with the best tools and methods, finding the perfect ring size at home can bring up a few tricky questions. Getting these details right is what makes the difference between a good fit and a perfect one. Let's walk through some of the most common queries we get from clients to make sure you can order with total confidence.
What Is the Average Ring Size in Australia?
It's a question we hear all the time! While it's interesting to know, relying on averages can be a bit of a gamble. For women, the most common ring size in Australia hovers around an M or N (that’s a US 6-7). For men, it’s typically a T or U (a US 10-10.5).
But here’s the thing: everyone is unique. These numbers are just a general guide. Your personal measurement is the only one that truly matters, so always trust what you measure over a national average.
Does a Wider Ring Band Need a Different Size?
Yes, absolutely. This is a critical detail that's easy to overlook. A wider band—anything about 6mm or more—takes up more real estate on your finger. This creates more friction and skin contact, which makes the ring feel much snugger than a delicate band of the same size.
As a rule of thumb, we recommend going up at least half a size, and sometimes even a full size, for a wide or chunky ring. If you've measured your finger with a thin strip of paper or a narrow ring sizer, you'll definitely need to factor this in.
My Knuckle Is Larger Than the Base of My Finger. What Do I Do?
This is probably one of the most frequent sizing puzzles we help solve. The key is finding that perfect balance—a ring that’s just big enough to slip over the knuckle without a struggle, but not so big that it spins around once it’s on.
The best approach is to measure both your knuckle and the base of your finger where the ring will sit. Your ideal size will usually be somewhere in between those two measurements. For instance, if the base of your finger is a size L but your knuckle measures as an N, a size M is often the perfect compromise.
Can Any Ring Be Resized?
Most rings crafted from precious metals like gold, platinum, and silver can be resized by a professional jeweller, usually up or down by one or two sizes. However, some designs just can't be altered.
Rings that are difficult, or even impossible, to resize include:
- Eternity Bands: With gemstones set the whole way around, there's no plain metal to work with, so resizing would disrupt the entire setting.
- Alternative Metals: Materials like titanium, tungsten, or ceramic are incredibly hard and can't be resized using traditional methods.
- Intricate Designs: Rings with detailed engravings or unique patterns can be damaged or warped during the resizing process.
This is why getting the size right from the very beginning is always the best plan.
At Daniel Fine, we believe your ring should feel like it was made just for you—because it was. If you need a hand confirming your size or you're ready to create a bespoke piece that tells your story, our experts are here to guide you. Explore our custom jewellery services at DanielFine.com.au and let's create something extraordinary together.